
When you see cracks spreading through your mortar joints, the first question that pops into your head is usually, "What's this going to cost me?" In Chicago, you can generally expect tuckpointing prices to fall somewhere between $12 and $25 per square foot for most standard brick repair jobs.
For a typical 500-square-foot section of a wall, that means you’d likely budget between $6,000 and $12,500. Of course, smaller, more contained jobs, like fixing up a chimney, can be much less, often starting around $500.
Understanding Chicago Tuckpointing Prices in 2026
Seeing your building's brickwork start to crumble is unsettling, but tuckpointing is the time-tested solution that brings back both its strength and curb appeal. Getting a handle on the cost, however, isn't about finding one magic number. It's more like getting a quote for a car repair—the final price really depends on what's going on under the hood, not just the year and model.
Here at Expert Super Seal, we've spent decades working on Chicago's classic brick buildings. We think you deserve to have a clear, honest picture of the costs involved before you ever have to make a call. This guide is designed to give you just that—a solid baseline for budgeting.
What to Expect for Your Budget
So, why the wide price range? The cost of any tuckpointing job comes down to the amount of skilled labor needed, the specific materials we have to use, and the overall complexity of the project.
While national averages often hover between $8 and $15 per square foot, major cities with historic architecture and high demand for true masonry craftsmen always trend higher. Here in Chicago, along with places like New York and San Francisco, it’s completely normal to see prices in the $12 to $25 per square foot range. You can explore more detailed cost breakdowns to see how our city compares on a national scale.
This "city premium" really boils down to a few key things:
- Skilled Labor Costs: True masonry is a craft. Experienced, reliable masons are in high demand, and their expertise is the biggest factor in the final bill.
- Site Accessibility: Working on a ground-floor wall is one thing. Working three stories up is another. Any job that needs extensive scaffolding, lifts, or special rigging will cost more due to the setup time, equipment, and safety measures involved.
- Historic and Specialty Mortars: Those beautiful old brick buildings in neighborhoods like Lincoln Park or Wrigleyville often weren't built with modern Portland cement. They need special lime-based mortars to match the original construction, which are more costly and require a different skillset to apply correctly.
Key Takeaway: The per-square-foot price is a great starting point, but your final quote will always be tailored to your property. The height of the wall, the type of brick, and the extent of the deterioration are just as crucial as the total square footage.
To give you a clearer idea of how these numbers translate to real-world projects, we've put together a quick summary of common scenarios we see across the Chicago area.
Chicago Tuckpointing Price Estimates at a Glance (2026)
This table breaks down typical price ranges for different tuckpointing jobs, giving you a ballpark figure for budgeting purposes.
| Project Type | Typical Price Range (Per Sq. Ft.) | Common Project Cost |
|---|---|---|
| Spot Repairs (Small Cracks) | $20 – $35+ | $500 – $1,500 |
| Standard Wall Section | $12 – $25 | $6,000 – $12,500 |
| Chimney Repair | $18 – $30 | $1,000 – $4,500 |
| Historic Building (Lime Mortar) | $22 – $40+ | $11,000 – $20,000+ |
Remember, these are estimates. The only way to get a firm number is to have a professional mason inspect the brickwork in person.
The Key Factors Driving Your Tuckpointing Bill
If you've gotten a few quotes for a tuckpointing job, you might be staring at a pretty wide range of numbers. It’s not uncommon to see one contractor bid $3,000 while another quotes $10,000 for what looks like the same project. This doesn't automatically mean someone is trying to rip you off. The truth is, the final price tag is a mix of several crucial factors that can dramatically change the scope of the work.
Think of it like a mechanic looking under the hood. The repair cost isn’t just about the car’s make and model; it’s about what’s actually broken. Is it a quick part swap or a full engine rebuild? Tuckpointing works the exact same way. A true professional doesn't just see a brick wall; they see a unique puzzle of conditions that dictate the time, skill, and materials needed to do the job right.
Let's break down exactly what those puzzle pieces are.
Damage Extent and Preparation Work
The single biggest driver of your cost is the real-world condition of your mortar and brick. A few hairline cracks are one thing. Entire sections of mortar that have turned to sand are a completely different ballgame. The worse the damage, the more painstaking and labor-intensive the prep work becomes.
Before any new mortar goes in, all the old, failing mortar has to be carefully ground or chiseled out of the joints. This grinding process is dusty, noisy, and requires a steady hand to avoid chewing up the edges of the brick.
- Minor Cracks: If you’ve just got a few problem spots, a mason can target those specific areas. This keeps the prep time—and your labor bill—to a minimum.
- Widespread Deterioration: When mortar across a large area is soft and crumbling, every single joint needs to be ground out. This can easily multiply the labor hours required for the job.
- Brick Spalling: This is when water gets behind the mortar and causes the face of the brick itself to pop or flake off. Any spalled bricks have to be individually cut out and replaced, adding to both material and labor costs.
This is a good visual breakdown of where the money goes.
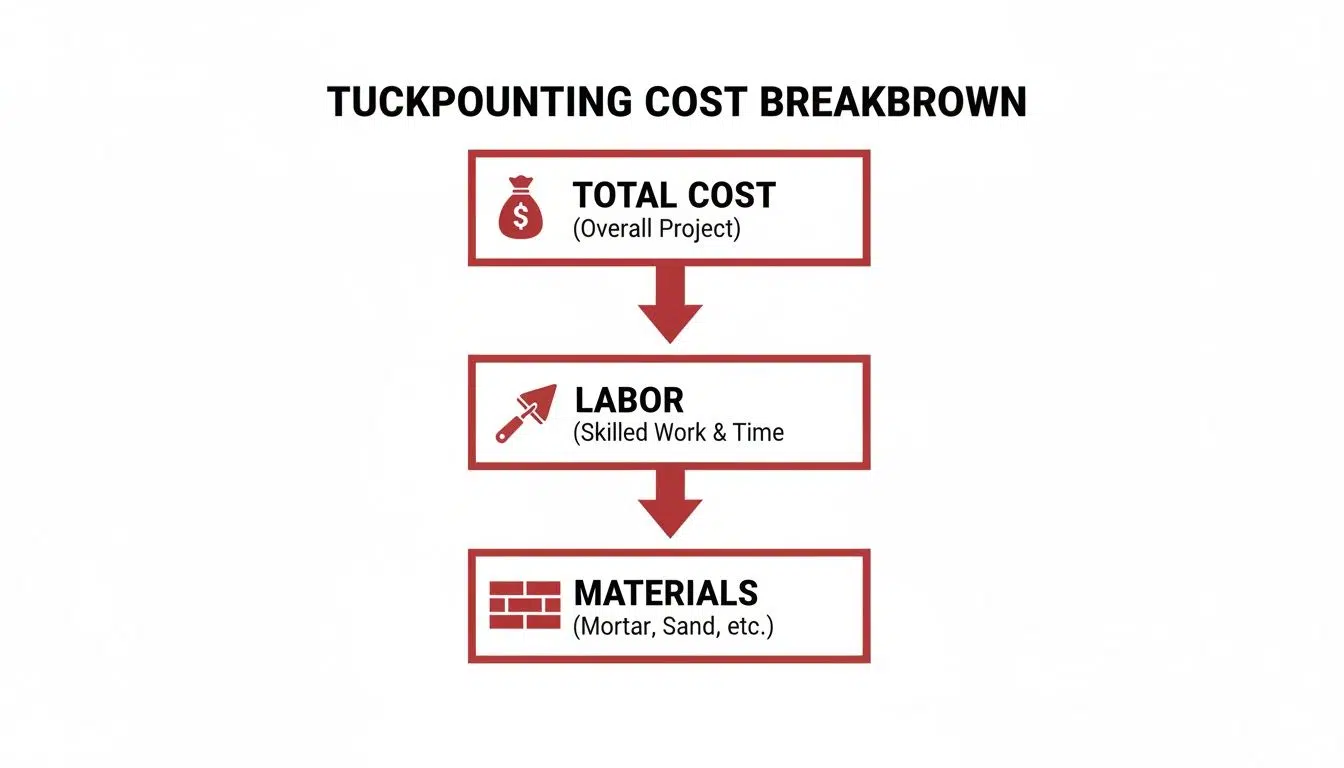
As you can see, labor is the lion's share of any tuckpointing project. You’re paying for a mason’s time and skill, not just a bag of mortar.
Job Site Accessibility and Safety
Now, think about where the damage is. Answering this question can have a massive impact on your final price. Repairing a few joints on a ground-floor wall is simple. Doing that same repair on a third-story facade or a tall, narrow chimney is an entirely different kind of project.
Accessibility isn't just about making the work easier; it's a fundamental issue of safety and logistics. Any work above the first story demands specialized equipment to protect the crew and the property.
This equipment comes with its own set of costs that get passed into the estimate:
- Scaffolding: For any large-scale work on upper floors, sectional scaffolding has to be delivered, assembled, and then taken down again. It's a job in itself and adds a significant cost.
- Lifts and Booms: Sometimes, a hydraulic lift is more efficient than scaffolding, but the rental fees for this heavy machinery will be part of your quote.
- Safety Harnesses and Rigging: All high-angle work is governed by strict safety rules. The time and gear needed for proper rigging are factored in.
Put simply, the higher up the work, the higher the cost. This factor alone can easily double the price per square foot when compared to an identical repair at ground level.
Mortar Type and Material Matching
Not all mortar is the same, and using the wrong kind is one of the costliest mistakes a homeowner can make. Most modern buildings use a hard, durable Portland cement-based mortar. It’s strong, easy to find, and fairly cheap.
But here in Chicago, our beautiful vintage brick buildings—especially those built before 1940—were almost always built with a softer, more breathable lime-based mortar.
Slapping modern Portland cement mortar onto a historic brick wall is a recipe for disaster. The new mortar is harder than the old brick, trapping moisture inside the wall. Over a few winters, this trapped water will freeze and expand, causing the bricks themselves to crumble from the inside out. A proper, lasting repair demands matching the original mortar composition—no exceptions.
- Lime Mortar: This historic material is more expensive than modern mixes and requires a mason with specific experience to mix and apply it correctly.
- Color Matching: Even with modern mortar, getting a seamless color match with the existing, weathered joints takes a good eye. Custom color pigments can also add a small amount to the material cost.
These factors help explain why prices have been climbing. Before 2015, you might have seen tuckpointing costs as low as $5-$10 per square foot. Today, with a shortage of skilled masons in Chicago, that price is closer to $10-$25 per square foot for work that requires scaffolding. For ornate historic restorations, like those on buildings in Wrigleyville, prices can even hit $40 per square foot to properly preserve their character. You can check the latest tuckpointing cost data to see how these city-wide trends might affect your budget.
Real Tuckpointing Estimates for Chicago Buildings

Theory is one thing, but what do these numbers actually look like on a real Chicago building? It’s much easier to grasp the costs when you can connect them to a specific property and a real-world problem.
To pull back the curtain, we’re going to walk through three different project estimates based on actual jobs our Expert Super Seal crews have completed. These aren't just hypotheticals—they're stories of real Chicago-area properties, each with its own unique set of challenges.
Seeing how a professional quote comes together, from the initial problem to the final price tag, will help you visualize what to expect for your own building.
Scenario 1: A Wrigleyville Bungalow Chimney Rebuild
Our first stop is a classic brick bungalow near Wrigley Field. After years of facing down Chicago’s brutal freeze-thaw cycles, the homeowner’s chimney was in rough shape. They had spotted loose bricks and crumbling mortar—a tell-tale sign of trouble we see all the time. The parapet walls at the front of the home were also starting to show some serious cracks.
Project Overview:
The top section of the chimney was the main concern; it was becoming structurally unsound. Our plan involved carefully taking down the top five feet, salvaging as many original bricks as possible, and rebuilding it from scratch with fresh, color-matched mortar. We also had to grind out and tuckpoint about 80 square feet of the front parapet wall.
Itemized Cost Breakdown:
- Labor: This was the biggest ticket item. It took a two-person masonry crew three full days to manage the delicate demo, the chimney rebuild, and the grinding and tuckpointing work.
- Scaffolding & Access: Getting to the chimney safely on a steep bungalow roof required setting up pipe scaffolding. The cost covered both the setup and the breakdown.
- Materials: We used a custom-blended mortar to perfectly match the home’s nearly century-old brickwork. The bill also included new flue liners and a solid concrete chimney cap to head off future water damage.
- Permits & Debris Removal: Because we were doing structural work on the chimney, a city permit was necessary. We also needed a dumpster on-site to haul away the old mortar and busted bricks.
Final Project Cost: $4,850
This job is a perfect example of how a "small" repair can involve much more than just tuckpointing. The structural work and high-angle access pushed the cost beyond a simple per-square-foot calculation.
Scenario 2: A Suburban Condo Facade Restoration
Next up is a three-story condominium building out in a suburb like Naperville. The condo association was facing a massive headache: widespread mortar failure across two entire sides of the building, covering roughly 2,200 square feet. Years of putting off maintenance led to ugly water stains and, understandably, a lot of unhappy residents.
Project Overview:
This was a pure restoration job. The mission was to grind out every single mortar joint on the building’s north and east-facing walls and repoint them completely. While there was no major structural damage, the sheer size of the job was the defining factor.
Itemized Cost Breakdown:
- Labor: A four-person crew was on-site for two straight weeks to tackle the enormous amount of grinding and repointing.
- Scaffolding & Access: We had to erect extensive sectional scaffolding to safely cover both elevations. This was a huge part of the budget, accounting for nearly 25% of the total cost.
- Materials: Since the building was from the 1980s, a standard Type N Portland cement mortar did the trick. Compared to labor and access, the material cost was a small fraction of the total.
- Site Management: Working on an occupied building means managing dust, noise, and resident access. We worked closely with the property manager to keep disruptions to a minimum.
Final Project Cost: $35,200
Coming in at $16 per square foot, this project shows how economies of scale work. Tackling a massive area all at once brings the unit cost down, even with major scaffolding expenses. For property managers, this is almost always a more budget-friendly approach than doing small, reactive repairs over the years.
Scenario 3: A Commercial Property with Lintel Failure
Our final case study is a two-story retail building in a busy commercial hub like Lincoln Park. Here, the owner had a serious structural emergency. The steel lintels supporting the brick above the large storefront windows were rusting and expanding—a problem we call "rust jacking." This was literally pushing the brickwork outward, causing it to bow and crack.
Project Overview:
This was a complex, surgical repair. We had to remove all the brickwork around four large window openings, cut out the failing steel lintels, and install new galvanized steel replacements. Then, our masons had to meticulously rebuild the brick arches above them and tuckpoint another 300 square feet of the surrounding wall.
Itemized Cost Breakdown:
- Labor: This isn't a job for a generalist. It required our most skilled masons who specialize in structural work and arch rebuilding. The precision involved meant a lot more labor hours.
- Materials: The quote included four new heavy-duty galvanized steel lintels, through-wall flashing, modern waterproofing membranes, and, of course, custom-matched mortar.
- Equipment: Beyond scaffolding, we needed temporary structural shoring to hold up the entire wall while the old lintels were being replaced.
- Permits: A structural alteration of this magnitude demands detailed architectural plans and city permits, which adds to the administrative overhead. Proper tuckpointing is critical in these situations, as you can see in our guide on the importance of maintaining brickwork in Lincoln Park.
Final Project Cost: $19,500
This project is a powerful reminder of how tuckpointing costs can skyrocket when structural steel replacement is involved. The price here wasn't driven by square footage, but by the technical complexity and high-stakes nature of the repair.
How to Estimate Your Own Tuckpointing Project
Walking into a big project blind is never a good feeling, especially when it comes to your home's budget. While you'll always need a professional quote for a final price, putting together a rough estimate yourself can give you a powerful head start. It helps you frame the conversation and plan your finances.
With a simple formula and a tape measure, you can get a surprisingly solid ballpark figure for your tuckpointing costs. Think of this as your first step—a way to understand the potential scope before calling in the experts.
The Go-To Formula for a Quick Estimate
At its heart, estimating a tuckpointing job is pretty straightforward. You just need to figure out the size of the repair area, multiply it by a realistic price per square foot, and then factor in any extra costs for challenges like height or special materials.
(Area Length in Feet x Area Height in Feet) x Price Per Sq. Ft. + Access Costs = Estimated Budget
This calculation gives you a baseline cost for the work itself. From there, we can add in the unique variables of your property.
Step 1: Get Your Measurements
First things first, grab a tape measure. You need to get the dimensions of the brick walls or sections where the mortar is failing. Don't stress about getting it perfect down to the last inch; a close approximation is all you need for a good budget estimate.
- Measure the length and height of each distinct wall section that needs repair.
- Multiply the length by the height for each section to find its square footage.
- Add up the square footage of all the problem areas to get your Total Repair Area.
For example, maybe you have one wall section that’s 10 feet long by 8 feet high (80 sq. ft.) and another that's 20 feet long by 5 feet high (100 sq. ft.). Your total repair area would be 180 square feet.
Step 2: Choose a Realistic Price Per Square Foot
Now, you need to assign a dollar value. Looking back at the price ranges we’ve discussed, here’s a good rule of thumb for budgeting in Chicago:
- $12 – $18 per sq. ft. is a solid baseline for simple, ground-level work on a newer building where access is easy.
- $18 – $25 per sq. ft. is more likely for projects needing scaffolding (like a second story) or for historic homes that require a specific mortar mix.
- $25 – $40+ per sq. ft. should be your expected range for complex jobs, like tuckpointing high chimneys, intricate decorative brickwork, or areas with significant structural damage.
Let's continue with our example. If your 180 sq. ft. of damage is on the second story of your home, using a midpoint figure of $20 per sq. ft. is a realistic choice. That brings your base estimate to $3,600 (180 x $20).
Step 3: Factor in Additional Costs
Finally, think about the "extras." This is where project costs can really change. Does the work involve a tall chimney or a third-story facade? You'll need to budget for scaffolding rental and setup, which can easily add $1,000 to $3,000 or more to the total.
Recent project data shows that while a standard chimney repair might run from $500 to $2,500, tuckpointing an entire house exterior can quickly climb over $10,000. This jump really highlights how labor, equipment access, and the unique conditions of Chicago's older buildings drive the final price. For a broader perspective, you can learn more about national tuckpointing cost averages from Angi's detailed guide.
Once you have this rough number, you’re in a much stronger position to talk with a professional. And when you're ready for that precise, on-site quote, you can get fully prepared by reading more about our tuckpointing services.
Choosing the Right Chicago Tuckpointing Contractor

Getting a few tuckpointing quotes is straightforward. Knowing how to actually read them? That's the real skill. An estimate shouldn't just be a number at the bottom of a page; it’s a blueprint detailing exactly what a contractor intends to do to your building.
It's tempting to jump at the lowest bid, but that's often where the trouble starts. A cheap quote frequently hides shortcuts that lead to shoddy work, surprise costs, and major headaches down the road. Let's dig into what separates a solid, professional proposal from a red flag you should run from.
Look for a Detailed Scope of Work
The heart of any good quote is the scope of work. If you see a vague line item like "Tuckpoint front wall," be wary. A true professional leaves no room for guesswork and provides a specific, step-by-step plan.
A trustworthy estimate will always spell out:
- Locations: Which exact walls, sections, or chimneys are included? Is it the full parapet or just a few trouble spots?
- Preparation: How will they get the old mortar out? Will they use grinders or hand chisels? Crucially, how deep will they grind the joints?
- Repairs: Does the price include replacing cracked or spalled bricks? What about steel lintel repair or waterproofing?
- Cleanup: How will they manage dust and debris? A plan for a clean, safe site from start to finish is the mark of a pro.
If one contractor's price is drastically lower than the others, check their scope of work first. They might be planning to grind the joints less deeply or are skipping brick replacement entirely. These are the kinds of shortcuts that undermine the whole point of the repair.
Verify Materials and Methods
We’ve already covered how critical the right mortar is, especially for Chicago’s vintage brick homes. Your quote needs to explicitly state the type of mortar they'll be using.
A professional will always specify if they're using a modern Type N mortar or a softer, historically appropriate lime-based mortar. Vague language like "premium mortar" isn't good enough.
Beyond the mortar mix itself, look for details on the color-matching process. Will they just grab a standard color off the shelf, or will they take the time to create a custom blend that disappears into your existing brickwork? A contractor who cares about craftsmanship will always mention this, as it's key to a seamless, professional finish.
Confirm Licensing, Insurance, and Warranties
This isn't just paperwork; it’s about protecting your property and your wallet. Never even consider hiring a contractor who isn't fully licensed, bonded, and insured for work in Chicago. Ask to see their insurance certificates—you need to confirm they have both general liability and worker's compensation. If they don't, you could be on the hook for any accidents.
Finally, a warranty is your safety net. But remember, a warranty is only as strong as the company backing it.
- Workmanship Warranty: This protects you from application errors, like mortar that fails and falls out way too soon. One year is the absolute minimum; a good company will stand behind their work for longer.
- Material Warranty: This covers the actual products used.
At Expert Super Seal, we build our quotes on complete transparency. We provide a detailed scope, name every material, offer clear warranties, and have our credentials ready. We know an informed client is the best partner for a successful project. You can see our commitment to doing things the right way by exploring our professional tuckpointing services in Chicago. Choosing the right partner means getting the job done right the first time.
Protecting Your Investment with Quality Tuckpointing
After breaking down all the numbers, from square footage to scaffolding, it's easy to get lost in the immediate costs. But the single most important thing to remember is this: quality tuckpointing isn't an expense. It's a critical investment in the health, safety, and future value of your property.
Think of it as essential preventative care for your building. By fixing those crumbling mortar joints now, you're stopping a chain reaction of much costlier problems down the road. You’re preventing water from creeping into your walls, where it can lead to devastating structural damage, rot, and even mold.
More Than Just Filling Cracks
A cheap patch job might seem like a good deal, but it's often a trap. It might look decent for a year or two, but it rarely addresses the root cause of the mortar failure. A true masonry professional doesn’t just slap mortar into a gap; they figure out why it failed in the first place and restore the entire wall system's integrity.
It's the difference between putting a band-aid on a problem and actually fixing it for good. The long-term rewards of doing the job correctly the first time are huge:
- Structural Stability: Strong, properly sealed mortar joints are your building's primary defense against water, the number one enemy of Chicago brickwork.
- Increased Property Value: There's no denying it—crisp, clean mortar lines give a massive boost to curb appeal. It sends a clear signal to potential buyers that a property is solid and well-cared-for.
- Energy Savings: Every crack and gap in your mortar is a tiny leak. These leaks let your heated or cooled air escape, creating drafts and making your HVAC system work overtime, which shows up on your utility bills.
Your Chicago property is one of your biggest assets. Protecting its structural integrity isn't the place to cut corners. Choosing a contractor who understands our city's specific building codes, weather challenges, and historic materials is the only way to ensure the work lasts. A reputable, experienced partner guarantees your investment pays off, keeping your building strong and beautiful for decades to come.
Your Questions About Tuckpointing Costs Answered
After talking through all the details of what drives tuckpointing costs, there are usually a few lingering questions. We get asked these all the time by building owners across Chicago, so let's tackle them head-on with some straight, practical answers.
Is Repointing Cheaper Than Tuckpointing?
It’s a great question, and the answer is almost always yes—because they aren't quite the same job. Think of repointing as the essential, structural part of the work. It’s all about grinding out that old, crumbling mortar and packing the joints with fresh, strong material to make the wall solid again.
Tuckpointing is the "plus" version. It starts with repointing, but then adds a final, artistic touch. A mason skillfully applies a very thin, straight line of a contrasting color (often white or black) down the center of the new mortar. This creates that sharp, clean look you see on beautifully restored brick buildings. That extra step takes more time and a steadier hand, which is why it costs more. Repointing fixes the structural issue; tuckpointing fixes the issue and makes your building look incredible.
How Often Should I Tuckpoint My Chicago Building?
A proper, professional tuckpointing job should hold up for a long, long time—easily 25 to 30 years. But in a city like Chicago, you can't just set it and forget it. Our brutal freeze-thaw cycles are the real enemy. Moisture seeps into tiny cracks, freezes, expands, and basically pries your mortar apart from the inside out.
That’s why we strongly recommend being proactive. Have your building inspected every 5 to 10 years. Catching a few small problem areas early means you’re just dealing with a quick, targeted repair. Waiting until you see widespread damage means you’re facing a much bigger, more disruptive, and far more expensive restoration project.
Can I Get Financing for a Major Tuckpointing Project?
Absolutely. We understand that a full-facade restoration or a major chimney rebuild is a significant investment. Most reputable contractors are well-prepared for this and know that financing is often necessary to get the work done right.
Homeowners and property managers typically explore a few common paths:
- Home Equity Lines of Credit (HELOCs): A popular way to use your property's value to fund critical improvements.
- Personal Loans: A straightforward option from most banks and credit unions.
- Contractor Financing: Some larger companies, like ours, have relationships with lenders and can help you explore direct financing options.
Never be afraid to bring up financing when you’re getting estimates. A good contractor will be transparent about payment schedules and can help you find a solution that fits your budget. The goal is to make essential repairs possible without putting you in a financial bind.
What Should a Good Tuckpointing Warranty Cover?
A warranty is more than a piece of paper; it’s a direct reflection of a company’s confidence in its own work. A flimsy promise from a "Chuck in a truck" is worthless the second he drives away. A solid warranty from an established company is a guarantee they'll be there if something goes wrong.
A truly dependable warranty should clearly cover two things:
- Workmanship: This protects you if the job itself was done poorly—for example, if new mortar cracks or falls out prematurely because it wasn't mixed or applied correctly. One year is the bare minimum, but seasoned pros often offer much longer terms.
- Material Failure: This covers you if the mortar mix or other products used were defective from the manufacturer.
Hiring a licensed, insured, and long-standing company like Expert Super Seal means you're not just buying a service; you're buying peace of mind. We've been a part of the Chicago community for decades, and we plan on being here for decades more to stand behind every job we do.
When you're ready to protect your property with tuckpointing done right the first time, our team at Expert Super Seal Roofing & Tuckpointing is here to help. Contact us today for a free, no-obligation estimate.