When people ask about the cost of exterior brick repair in Chicago, they’re often looking for a simple number. The truth is, it’s not quite that easy. While we see most standard jobs fall between $20 and $40 per square foot, that's just a starting point.
For most homeowners, a typical project to fix cracked or spalling bricks might run anywhere from $799 to $2,614, with the average landing right around $1,704.
Your Quick Guide To Chicago Brick Repair Costs
So, why the wide range? Think of it this way: getting a quote for brickwork is a lot like taking your car to the mechanic. An oil change has a pretty standard price. But when you tell them there's a "weird noise," they have to get under the hood to diagnose the real problem before they can tell you the cost. Masonry is the exact same.
A few hairline cracks in the mortar on your bungalow is one thing. A whole section of a bulging wall on a classic three-flat? That's a completely different ballgame, requiring more intensive labor, materials, and structural know-how. The only way to get a firm number is to have an expert see the building in person.
Breaking Down Common Repair Costs
What you end up paying is tied directly to the specific problem we're solving. Some issues are straightforward, while others point to deeper, more complex troubles within the wall system.
Here’s a look at how different types of damage impact the budget:
- Minor Mortar Cracks: These are generally your most affordable fixes. We carefully grind out the old, failing mortar in specific spots and repoint the joints. It's precise work but usually contained to small areas.
- Spalling Bricks: When the face of the brick itself starts to crumble and flake off, the cost goes up. Each damaged brick has to be surgically removed and replaced with a new one that matches the original color and texture.
- Bowing or Bulging Walls: This is a red flag for a serious structural issue and represents the most expensive type of repair. It often means the ties holding the brick to the building's frame have failed, and we may need to rebuild entire sections of the wall and install new supports.
To give you a clearer picture of what to expect for your property, here’s a breakdown of common services and their estimated costs in the Chicago area for 2026.
Estimated Brick Repair Costs In Chicago For 2026
This table gives you a solid starting point for budgeting. Keep in mind these are benchmarks—the final price will depend on the unique conditions of your building, which can only be determined by a detailed on-site inspection.
| Repair Service | Average Cost Range | Typical Scenario |
|---|---|---|
| Tuckpointing (Spot Repair) | $25 – $50 per square foot | Fixing crumbling mortar joints in a specific area, like beneath a window or on a small patch of a wall. |
| Brick Replacement | $15 – $35 per brick | Replacing individual bricks that are badly cracked, spalling, or broken, which includes labor and finding a matching brick. |
| Lintel Replacement | $700 – $4,000+ per lintel | Swapping out a rusted, failing steel lintel above a window or door. The cost varies widely depending on the span and the amount of masonry that has to be rebuilt around it. |
| Parapet Wall Rebuild | $150 – $350 per linear foot | Rebuilding the top of a deteriorated parapet wall, a frequent necessity for Chicago's many flat-roofed buildings. |
These figures line up with what we see on the ground every day. Looking at wider industry data, you'll find that the $20 to $40 per square foot range for professional work is consistent. For a broader perspective, you can see how these numbers stack up against the national brick wall repair cost averages from Angi. This isn't just an expense; it's an investment in your property's health and value, which makes choosing the right contractor absolutely critical.
What Goes Into Your Brick Repair Quote?
Ever gotten two wildly different quotes for the same brick repair job and wondered what’s going on? It’s a common story. You’re left wondering if one contractor is trying to pull a fast one, or if the other is just cutting corners. The reality is that a professional mason has to weigh several key factors before ever putting a number on paper.
I like to compare it to a trip to the dentist. A regular cleaning has a pretty standard price. But if that check-up reveals a deeper problem that needs a root canal, the whole situation changes. Suddenly, the work is more complex, takes far longer, and, you guessed it, costs more. Brick repair works the same way. The final bill isn't just about patching what you can see; it's about addressing the full scope of the problem.
This graphic gives you a solid overview of the cost benchmarks you can expect here in Chicago.
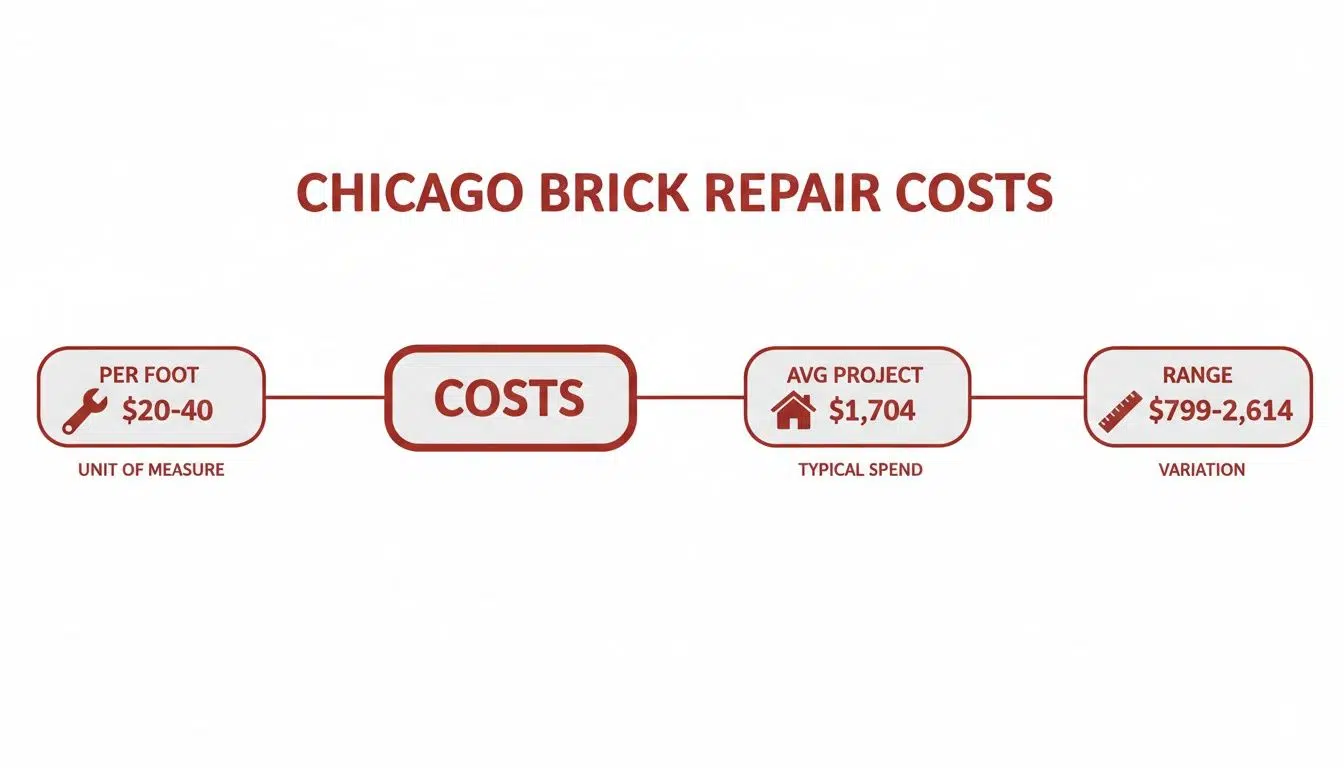
As you can see, while the price-per-foot is a useful starting point, most real-world projects involve a lot more, which is why the typical project cost has such a broad range. Let’s break down exactly what a contractor is looking at.
The Scale and Scope of the Damage
By far, the biggest piece of the pricing puzzle is the sheer size of the problem. The first thing we do is assess the total square footage of the damage. Are we just fixing a few crumbling mortar joints under a window, or is an entire wall bowing and threatening to fail?
- Minor Fixes: Small, isolated issues are always going to be on the lower end of the cost spectrum. Think a handful of cracked bricks or a small patch of worn-out mortar. The work is contained, so labor is minimal.
- Major Structural Work: This is a whole different ball game. When we see large-scale spalling (flaking) across a facade, a bulging parapet wall, or other signs of structural distress, the job gets complicated. These projects demand more masons, more materials, and often, temporary structural supports to keep everyone safe.
A simple patch-up might be an in-and-out job for one person. Rebuilding a failing wall, on the other hand, could tie up a full crew for days.
Accessibility and Site Logistics
Where the damage is on your building is almost as important as the damage itself. Working on a first-floor wall is one thing; working on a chimney three stories up is another entirely. How difficult it is to physically get to the work area has a direct impact on labor costs.
A good rule of thumb is: the harder it is to reach, the more it will cost to fix. We have to factor in the time, equipment, and safety protocols for any elevated work.
Think about these common Chicago scenarios:
- Ground-Level Work: If we can walk right up to the wall with our tools and ladders, it’s the most straightforward and cost-effective job.
- Multi-Story Buildings: Repairing the facade on the third floor of a classic Chicago three-flat means one thing: scaffolding. The cost to rent, set up, and take down that scaffolding is a major line item on any estimate.
- Tight Urban Spaces: Working in a narrow gangway in Lincoln Park presents more logistical hurdles than a home with a wide-open yard. Just getting materials and equipment in and out can add significant time and labor to the project.
The Art of Matching Historic Brick
Finally, in a city with architecture as rich as ours, the materials matter. A lot. Chicago’s buildings are a beautiful patchwork of brick styles, colors, and textures from different eras. A great repair is one you never notice because the new work blends perfectly with the old.
Sourcing the right materials can be a real challenge. A standard modern red brick is easy to find and cheap. But tracking down a specific turn-of-the-century "Chicago Common" to match the rest of your vintage bungalow? That requires a specialized hunt.
These reclaimed or custom-fabricated bricks can be significantly more expensive than their modern counterparts. The same goes for the mortar—it needs to be color-matched and, more importantly, have the right composition to avoid damaging the old brick. This attention to detail is what separates a quick patch from a lasting, professional repair.
Making Sense of Tuckpointing, Lintel Repair, and Other Common Fixes
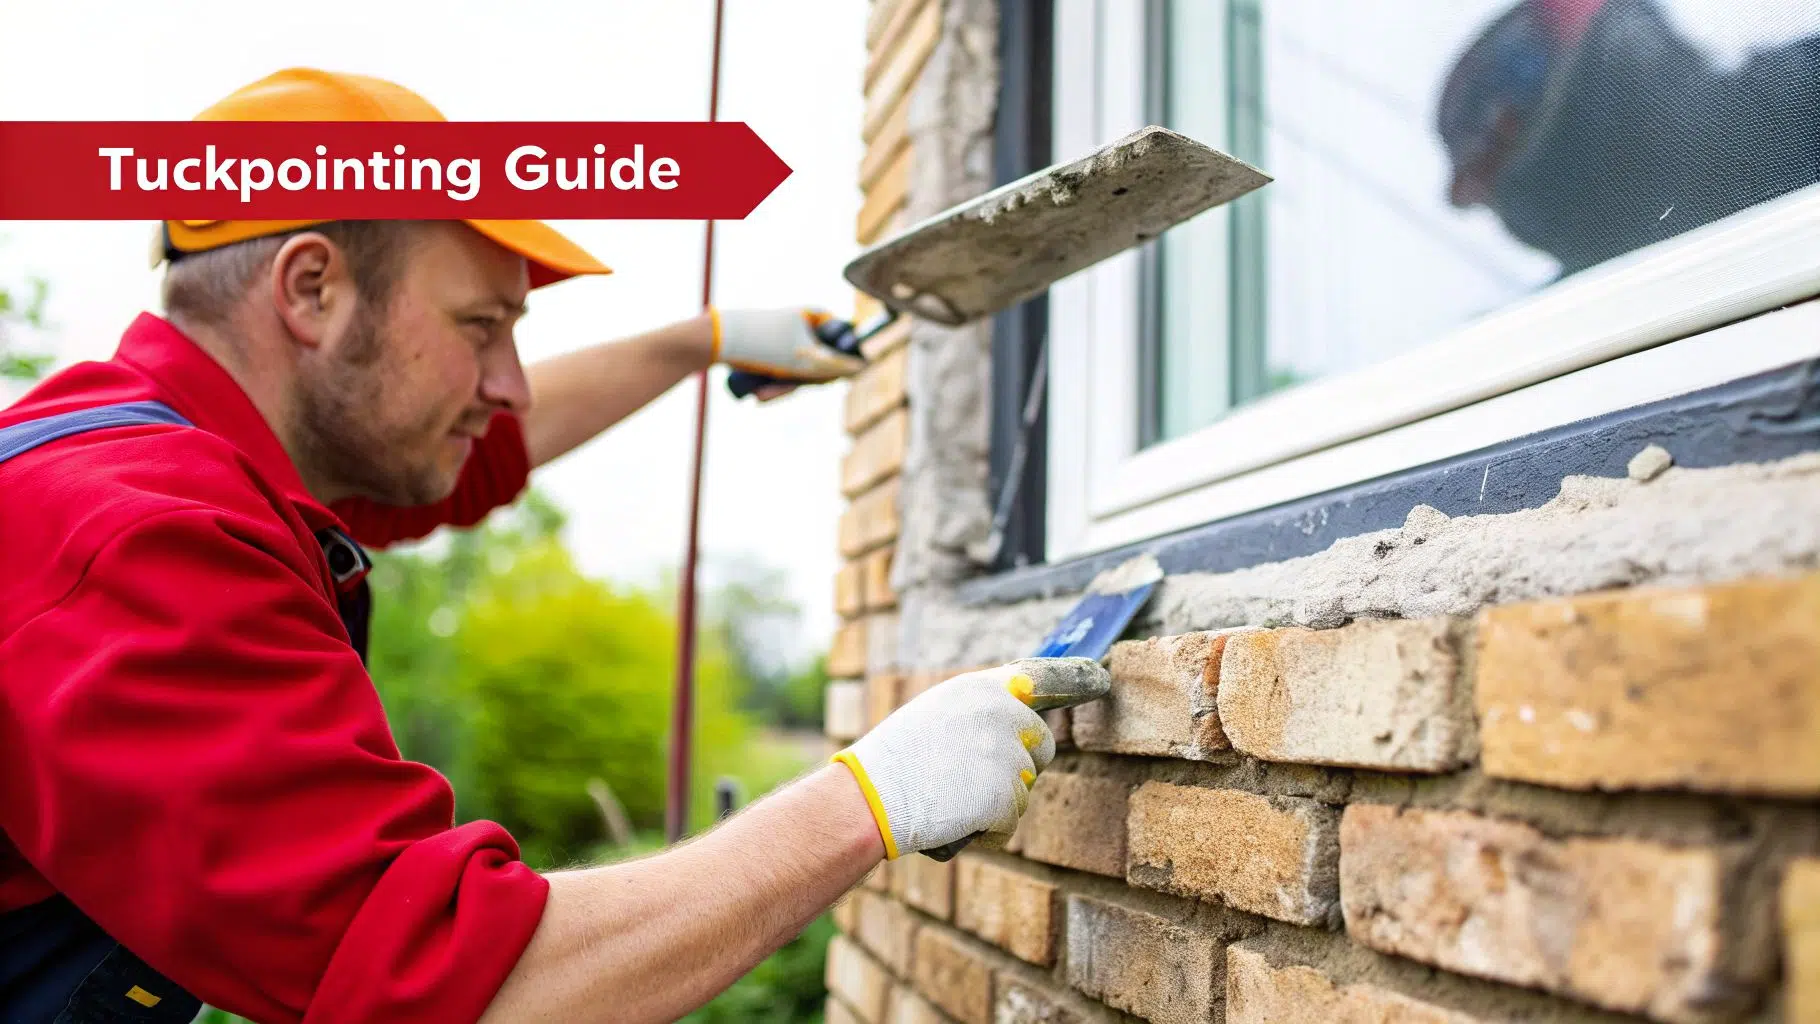
When a masonry estimate lands in your hands, it can feel like you’re trying to decipher a foreign language. Terms like "tuckpointing" and "lintel replacement" are everyday speak for contractors, but they often leave property owners scratching their heads. Getting a handle on these key services is the first step toward understanding exactly what you’re paying for—and why it’s so critical for your building’s health.
Think of your brick facade as more than just a wall. It’s a complex system where every single brick is held in place by mortar. When that "glue" starts to break down, the whole structure is put at risk.
What Is Tuckpointing and Why Do You Need It?
At its core, tuckpointing is the craft of grinding out old, failing mortar from the joints of your brickwork and replacing it with a fresh, durable batch. This isn't just a cosmetic touch-up. It's one of the most important maintenance jobs for a brick building, sealing it off from water infiltration—the number one cause of serious masonry damage.
The warning signs are pretty easy to spot once you know what to look for:
- Visible Cracks: You might see hairline fractures or even larger gaps opening up in the mortar joints.
- Crumbling Mortar: If you can easily scrape out the mortar with a key, it’s lost its strength and is no longer doing its job.
- Damp Patches Inside: Dark spots on your interior walls often mean water is working its way through weak mortar joints.
Proper tuckpointing is a real skill. For Chicago's historic buildings, it demands a mason who can meticulously match the new mortar’s color, texture, and composition to the original. This ensures the repair is not only invisible but also "breathes" correctly with the old brick, preventing new problems from developing. For a deeper dive, you can learn more about tuckpointing prices in our comprehensive guide.
The Crucial Role of Lintel Repair
Look above any window or door on your brick property. There’s a horizontal support beam hidden in there called a lintel. In most Chicago buildings, it’s a piece of steel, and its job is to carry the entire weight of the bricks above that opening. Unfortunately, with our city’s harsh weather, these steel lintels are incredibly prone to rust.
As steel rusts, it expands in a process we call "rust jacking." This expansion puts immense pressure on the surrounding brick, creating those classic stairstep-shaped cracks that snake up and away from the corners of windows and doors.
If you spot these stairstep cracks, you’re not just looking at a simple mortar issue. You’re seeing the primary symptom of a failing lintel. Just tuckpointing over those cracks is like putting a bandage on a broken bone—it won't fix the underlying problem. The lintel itself has to be replaced.
Lintel replacement is a much more involved job. It requires a crew to carefully support the wall, remove the bricks above the window, cut out the old rusted steel, install a new and properly coated lintel, and then expertly rebuild the brickwork. It’s a structural repair that is absolutely essential for the long-term stability of your walls.
Other Common Masonry Fixes
Beyond those two big-ticket items, your Chicago exterior brick repair cost might include work on other vulnerable spots.
- Parapet Wall Repair: On flat-roofed buildings, the parapet is the short wall that extends above the roofline. Exposed to weather on three sides, it takes a serious beating and is a common failure point. Repairs can range from simple tuckpointing to a full rebuild.
- Chimney Repair: Much like parapets, chimneys are constantly exposed. Common repairs include tuckpointing, replacing the concrete "crown" on top, or, in more severe cases, rebuilding the entire stack from the roofline up.
Tuckpointing is a key part of most of these repairs, and its cost is a major factor. In the Chicago area, expect tuckpointing to range from $9 to $25 per square foot. For a typical 500-square-foot wall, that could mean a project cost between $6,000 and $12,500. Once you understand what these individual services entail, you can move from being a passive observer to an informed property owner who can evaluate any estimate with confidence.
Real Chicago Brick Repair Projects And Their Costs
Talking about square footage and material costs is one thing, but what does that actually look like on a real Chicago street? The best way to get a true feel for exterior brick repair costs is to see how everything comes together on actual job sites.
Let's walk through three common projects we tackle every week, from a small-scale bungalow fix to a major commercial restoration. Each one tells a story about a different building with its own unique problems, showing exactly how the scope of work drives the final price.
Scenario One: The Bungalow Rescue
The owner of a classic brick bungalow in Avondale called us with a common concern. The mortar under their two big front windows was turning to dust, and a few bricks were starting to spall—that's when the face of the brick flakes and pops off. They were right to worry about water getting in.
The Problem: This was a textbook case of Chicago's freeze-thaw cycle at work. Years of moisture had hammered the mortar joints, and that water intrusion caused about a dozen bricks to fail. It was a localized issue, but one that could easily spread and cause much bigger headaches if ignored.
The Scope of Work: We went in with a surgical approach. After protecting the landscaping, our masons carefully ground out the bad mortar around both windows, which was an area of about 50 square feet. We then removed the 12 spalled bricks and sourced matching reclaimed Chicago commons to get a seamless, authentic look. Finally, we tuckpointed the joints with color-matched mortar and set the new bricks.
Final Cost Breakdown:
- Labor: Two masons, one full day.
- Materials: Mortar mix, 12 reclaimed bricks.
- Equipment: Grinders and hand tools.
- Total Project Cost: Approximately $2,200
This is the perfect example of a targeted repair. It stops the damage in its tracks and protects the home's value for a very manageable cost.
Scenario Two: The Three-Flat Facelift
Now, let's scale things up. A property manager for a vintage three-flat in Lakeview had a much more urgent problem. Tenants were hearing strange creaking noises, and a quick look at the front of the building revealed alarming stairstep cracks coming from the corners of all six windows. Even worse, the parapet wall at the roofline was leaning forward.
The Problem: This wasn't just cosmetic; it was structural. The steel lintels over every single window—the beams that support the brick—had rusted and expanded. This process, called "rust jacking," was literally pushing the brickwork apart from the inside out. The parapet wall was also failing after decades of being exposed to the elements.
The Scope of Work: This was a serious, multi-day operation that required a full crew and scaffolding for the entire three-story facade.
- First, we erected scaffolding across the building's front.
- We then carefully dismantled the brick above all six window openings.
- The rusted, failed steel lintels were removed and replaced with new, properly coated steel beams.
- The brickwork was rebuilt over the new lintels.
- To ensure long-term stability, we ground out and tuckpointed all the remaining joints on the front facade (~750 sq. ft.).
- The top 24 inches of the 30-foot-long parapet wall had to be completely taken down and rebuilt.
Final Cost Breakdown:
- Labor: A crew of four masons working for five days.
- Materials: Six new steel lintels, hundreds of matching bricks, and a large batch of custom-mixed mortar.
- Equipment: Full scaffolding rental, heavy-duty grinders, and masonry saws.
- Total Project Cost: Approximately $28,500
Scenario Three: The Historic Commercial Restoration
Our last example takes us to a historic commercial building in the West Loop. The owners wanted to restore the building’s ornate facade, which was showing widespread spalling, open mortar joints, and heavy water staining after years of neglect.
A project of this scale is about more than just repair; it's about preservation. The goal is to restore the building's structural health and historic character simultaneously, which requires a meticulous approach from start to finish.
The Problem: This was the result of decades of deferred maintenance. Water had soaked deep into the masonry, causing brick failure across the facade. The old mortar had crumbled, and the building had zero modern waterproofing to shield it from Chicago weather.
The Scope of Work: This was a full-blown restoration.
- Extensive Brick Replacement: We had to identify, remove, and replace over 500 individual bricks, all sourced to match the building’s historic character.
- Complete Facade Tuckpointing: Every single mortar joint on the front of the building—around 2,000 sq. ft.—was ground out and repointed.
- Waterproofing: Once the masonry work was done, the entire facade was cleaned and treated with a professional-grade breathable sealant to block future water absorption.
- Logistics: This job required multi-level scaffolding, permits for sidewalk closures, and careful daily coordination to keep disruptions to a minimum for the businesses inside.
You can see what this kind of detailed work looks like up close by browsing our gallery of completed Chicago masonry projects.
- Final Cost Breakdown:
- Labor: A dedicated crew working for several weeks.
- Materials: Large, specialty orders of historic brick, custom mortar, and waterproofing sealant.
- Equipment & Permits: Multi-level scaffolding, city permits, and extensive safety setups.
- Total Project Cost: Approximately $75,000
Why You Can't Afford to Skimp on Permits and Materials
When you're looking at the cost of exterior brick repair in Chicago, it's natural to focus on the visible work and the labor involved. But there are two factors working behind the scenes that truly determine whether your repair will last for a few years or for a few decades: city permits and the quality of the materials. Trying to cut corners on either is a classic mistake that always comes back to haunt homeowners, leading to failed inspections, repeat repairs, and a hit to your property value.
Think of it like this: a professional brick repair is a science. You need the right formula (the mortar mix), the right components (the bricks), and the proper procedure (building codes and permits). Using the wrong stuff or ignoring the rules might seem cheaper at first, but you'll end up with a patch that crumbles and fails, taking your original brickwork down with it.
Getting Through Chicago's Masonry Permit Process
For any substantial brick repair, the City of Chicago is going to require a building permit. This isn't just a piece of paper; it’s a crucial checkpoint. A permit ensures that the work is being done to code by a qualified professional, which protects your investment, the structure of your building, and anyone walking by.
So, when do you actually need one? A permit is almost always required for work that affects the building's structure. This includes:
- Lintel Replacement: Lintels are the steel beams holding up the bricks over your windows and doors. Swapping them out is always considered structural work.
- Parapet Wall Rebuilds: If your parapet wall needs more than just a little tuckpointing, a full or partial rebuild will definitely need a permit.
- Large-Scale Rebuilding: Taking down and rebuilding a significant section of a wall is a major job that is absolutely not allowed without a permit.
Any reputable contractor will handle this entire process for you, from submitting the plans to the city for review. While minor tuckpointing often doesn't need a specific permit, don't be tempted to sneak major structural work past the city. It’s a huge risk that can lead to immediate stop-work orders and some seriously painful fines.
Why Quality Materials Are a Long-Term Investment
Once you have the city's green light, the next piece of the puzzle is the quality of the brick and mortar. This is what separates a repair that blends in perfectly and lasts a lifetime from a sloppy patch job that sticks out like a sore thumb and starts failing in a few years. An experienced mason knows the new materials have to work with the old ones, not against them.
The real art of a good repair is respecting the original building. That means painstakingly matching the new bricks in color, size, and texture, and formulating a mortar mix that has the same compressive strength and breathability as the historic mortar.
A common but devastating mistake is using modern, super-hard mortar on a vintage brick building. It's too rigid and ends up cracking and destroying the softer, historic bricks around it over time. Likewise, slapping in cheap, mismatched bricks just screams "bad repair" and lowers your home's curb appeal.
The cost for the bricks themselves can swing wildly, from $0.25 to $2.00 per brick. This translates to a material cost of under $2 to over $10 per square foot, all depending on what your specific home needs. As you can see by checking out current Chicago brick pricing, a standard brick used for new construction is a world away from the high-quality, color-matched face brick needed for a beautiful restoration.
Investing in the right materials and the expertise to install them isn't an upsell—it's the very foundation of a repair that lasts. It’s how you ensure your building not only looks right but stays structurally sound, protecting its value for years to come.
How To Choose The Right Chicago Masonry Contractor

Alright, you've got a handle on the potential costs and what the repairs involve. Now comes the trickiest part: finding the right crew to trust with your home. In a city the size of Chicago, the number of masonry contractors can feel staggering, but having a clear plan will protect both your property and your bank account.
This isn't about hunting down the absolute cheapest quote. It's about finding the best long-term value and genuine craftsmanship. Think of it like hiring a surgeon for your home—you wouldn't pick one based on price alone, right? You want experience, a steady hand, and proof they've successfully performed this exact procedure countless times. The same logic applies to protecting your biggest investment.
Your Contractor Vetting Checklist
To confidently sort through the options, use this checklist to separate the true professionals from the rest. Any reliable contractor will be happy to provide this information. If they hesitate, that's a major red flag.
- Licensed, Bonded, and Insured: This is the absolute bare minimum and is non-negotiable in Chicago. A license shows they meet city standards, bonding protects you if they can't finish the job, and insurance covers any accidents that happen on your property. Don't just take their word for it—ask for proof.
- A Proven, Local Track Record: Look for a company with deep roots right here in the Chicago area. They’ll have a much better grasp of our unique architecture, specific building codes, and the challenges our freeze-thaw cycles pose to masonry.
- A Portfolio of Recent, Similar Work: A mason who is proud of their work will be eager to show it off. Ask for photos of recent projects, especially ones that look like yours, whether it's a historic greystone or a modern brick-faced building.
- A Detailed, Itemized Estimate: A vague, one-line quote is a sign of a contractor who either doesn't know what they're doing or is planning to hit you with surprise fees later. A professional estimate breaks everything down: labor, materials, permits, and any special equipment costs like scaffolding.
The Importance of a Strong Warranty
A warranty isn’t just a piece of paper; it’s a contractor’s vote of confidence in their own work. When a company offers a clear, long-term warranty covering both their labor and the materials they use, they're standing by their craftsmanship.
Think of a warranty as the contractor’s promise that they’ve done the job right the first time. It gives you peace of mind that if an issue related to their work pops up down the road, they’ll be back to fix it—no arguments.
This commitment is what truly separates the pros from the pack. It shows they've used high-quality materials and proper techniques, like those essential for high-quality Chicago tuckpointing and brickwork. Taking these steps seriously ensures you end up with a partner who will protect your home’s structural integrity and value for years to come.
Common Questions About Chicago Brick Repair
Even after you’ve done your research on a big project, a few lingering questions always seem to pop up. When it comes to the exterior brick repair cost in Chicago, it's no different. Here are some straightforward answers to the questions we hear most often from homeowners just like you.
How Long Should Professional Tuckpointing Last?
When tuckpointing is done right, it's not something you should have to think about again for a very long time. A professional job, completed by a skilled mason using the correct materials for your specific building, should easily last 20 to 30 years, and sometimes even longer.
Of course, a few things influence that lifespan. The quality of the mortar mix is everything—it has to be compatible with your original bricks. The wall's exposure to Chicago's famous wind and rain also plays a part. But most importantly, it comes down to the quality of the work. It’s a craft that ensures the new mortar forms a perfect, water-tight bond.
Can I Handle Minor Brick Repairs Myself?
It’s tempting to tackle what looks like a small crack on your own, but masonry is one area where a DIY fix can go wrong fast. For anything more than the most minuscule hairline crack, this is a job for the professionals.
The biggest risk? Using the wrong type of mortar. Modern, hard mortars can actually destroy older, softer brick. This "fix" ends up causing the surrounding bricks to crack and crumble, creating a much more expensive problem than you started with.
A bad patch job isn't just ugly; it can actively damage your building's structure. A true mason understands the science behind how a brick wall breathes and moves, ensuring a repair strengthens it for the long haul.
What Time of Year Is Best for Masonry Work?
In Chicago, we’re always working with one eye on the weather, and masonry is no exception. The best time for any exterior brick repair is during the milder months, typically from late spring through early fall.
The reason is simple: temperature. Mortar needs time to cure properly, a process that is completely halted by freezing temperatures. If new mortar freezes, the trapped water will expand and shatter the joint from the inside out. As a rule, most professional-grade mortars require the temperature to stay above 40°F for at least 24 to 48 hours to set correctly.
How Can I Tell If My Mortar Is Failing?
Catching mortar failure early can save you a fortune in future repairs. The next time you're outside, take a walk around your property and keep an eye out for these telltale signs:
- Cracks and Gaps: Are there obvious fractures or spaces opening up in the mortar lines between the bricks?
- Powdery Dust: Take a key and gently scrape a mortar joint. If it crumbles into sand or dust, the binding agents have failed.
- Damp Spots: Do you see persistent dark or wet-looking patches on the brick? This often means the failing mortar is acting like a sponge and pulling water into your wall.
If you spot any of these issues, it’s a clear signal that it's time to have a professional take a closer look.
Ready to get a clear, no-obligation answer about your own brick repair needs? The team at Expert Super Seal Roofing & Tuckpointing has been protecting Chicago properties since 1972. Get a free, detailed estimate to understand exactly what your project requires. Contact us today to schedule your inspection