Minor glass block repairs usually run $75 to $250, a professional single block replacement typically costs $100 to $250, and a full unit replacement often falls between $250 and $600. If you're staring at a drafty, leaking, or cracked glass block window in Chicago, those numbers are the starting point for deciding whether this is a simple fix or a problem that can spread into the surrounding masonry.
A lot of homeowners notice the issue the same way. The basement feels colder near one wall. You see a hairline crack in one block. Maybe there’s dampness on the sill after a hard rain, or the mortar joints look sandy and tired. Glass block windows are durable, but they’re still part of the building envelope, and in Chicago that matters more than many online DIY guides admit.
The local problem isn't just age. It's movement, moisture, and repeated freezing and thawing. A repair that might hold in a milder climate can fail fast here if the wrong mortar, the wrong sealant, or the wrong technique is used. That’s why glass block window repair isn't just about patching what you can see. It's about stopping water, air, and structural stress from turning a small issue into a recurring one.
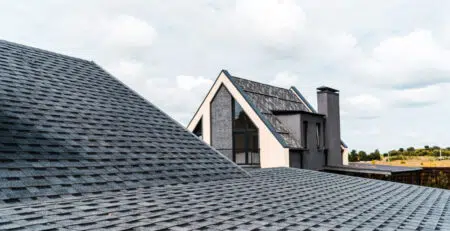
Your Guide to Glass Block Repair in Chicago
That foggy look inside a block or the faint draft on a windy day usually means something has already started to fail. Sometimes it’s a perimeter seal. Sometimes it’s a mortar joint. Sometimes the window itself is sound, but the surrounding masonry is letting water work its way in and around the unit.

Chicago changes the repair equation. Generic DIY advice often ignores how Chicago's 100+ annual freeze-thaw cycles can cause improperly mortared joints to crack within 6-12 months, because standard mortar can shrink 10-15% when freezing, creating gaps that invite moisture, as noted in this freeze-thaw repair warning for glass block windows.
What makes Chicago repairs different
In a warmer or drier climate, a homeowner can sometimes get away with a quick cosmetic patch and feel like the problem is solved. Here, water gets into tiny voids, temperatures swing, and the repair gets tested hard. If the joint isn't properly cleaned, packed, tooled, and sealed, winter will find the weak spot.
That matters most in basements and lower-level windows. Those openings sit close to splashback, saturated soil, drifting snow, and older foundation walls. If a glass block panel leaks, the water often shows up somewhere else first. You may see staining on interior paint or efflorescence on adjacent masonry before you notice the actual entry point.
Practical rule: If the symptom appears small but keeps returning after a patch, the real failure is usually deeper than the visible crack.
The right goal for a repair
A good repair does three things at once:
- Stops water entry at the joint, perimeter, or damaged block
- Handles movement without creating a new crack beside the old one
- Matches the surrounding assembly so the repair doesn't weaken the rest of the panel
That last part gets overlooked. A glass block window isn't only glass and mortar. It's a small masonry system tied to a sill, jambs, and the surrounding wall. Treat one piece incorrectly and the rest starts to react.
Chicago homeowners usually want a simple answer. Can this be sealed, or does it need to be rebuilt? The honest answer is that both happen. Hairline surface issues and isolated seal failures can be manageable. Broken blocks, loose panels, repeated leaks, and widespread mortar deterioration usually need a higher level of repair discipline.
How to Diagnose Your Glass Block Window Problem
Before you touch a chisel or caulk gun, inspect the window like a mason would. Most bad glass block window repair starts with a bad diagnosis. Homeowners see one crack and assume that's the entire problem. Often it isn't.

Start with a dry-day inspection
Use a flashlight and inspect from both inside and outside if you can access the opening safely. Look closely at the mortar joints between blocks and at the perimeter where the panel meets the masonry opening or frame.
Focus on these signs:
- Hairline mortar cracks. These may be surface-level, but if they run continuously across several joints, the panel may be moving.
- One clearly cracked block. An isolated damaged block is often repairable if the surrounding joints are still solid.
- Chalky, loose, or crumbling mortar. That points to deterioration, not just a cosmetic flaw.
- Dark staining or dampness on nearby wall surfaces. Water usually leaves a trail.
- A visible gap at the outer edge where sealant has pulled away from the surrounding masonry.
- Cloudiness or trapped moisture appearance that suggests seal failure or long-term water intrusion.
Check for movement, not just damage
Push gently on the panel with an open hand. You’re not trying to force it. You’re checking whether the assembly feels tight and planted or loose and hollow. A solid glass block panel should feel stable.
If the unit shifts, rattles, or sounds hollow around the perimeter, treat that as a warning sign. That usually means the issue extends beyond one bad joint.
If the whole panel feels loose, stop thinking in terms of patching one spot. You're dealing with an installation problem, not just a damaged block.
Follow the water path
Leaks rarely announce themselves at the exact point of entry. Water can come in at the top or side, travel along the surrounding masonry, and show up at the bottom edge indoors. That’s why you need to inspect the sill, adjacent brick or block, and any visible joint where materials meet.
Here's a straightforward approach:
| What you see | What it often means |
|---|---|
| Light surface crack in mortar | Early joint wear or shrinkage |
| One broken block | Localized impact or stress damage |
| Repeated moisture on interior sill | Failed perimeter seal or surrounding masonry issue |
| Cracks extending into nearby brick | Movement beyond the window itself |
| Multiple loose joints | Aging panel or poor original installation |
Look for clues the window wasn't the only problem
Some glass block failures start in the surrounding wall. If the foundation has minor movement, if old tuckpointing has opened up nearby joints, or if the sill isn't shedding water correctly, the window ends up absorbing the symptom. Repairing only the block panel won't solve that.
Use this threshold for deciding what you're really looking at:
- Cosmetic issue. Minor staining or a very shallow surface defect with no air or water leakage.
- Localized repair issue. One block, one small area of failed joint, one draft point.
- System issue. Recurrent leaks, multiple failed joints, movement, adjacent masonry cracks, or visible instability.
That third category is where homeowners waste time and money. They seal the symptom, winter arrives, and the opening leaks again.
A Practical Guide to DIY Glass Block Repairs
Some glass block window repair jobs are reasonable for a careful homeowner. Some aren't. The dividing line is precision. If you're doing a minor reseal or replacing a single damaged block and the rest of the panel is solid, a disciplined DIY approach can work. If you're improvising, rushing, or guessing on materials, Chicago weather will punish the repair.

What you can handle yourself
DIY makes the most sense for a narrow list of problems:
- Small perimeter air leaks where old sealant has clearly failed
- Minor mortar cleanup and resealing when the panel is otherwise firm
- A single cracked block in a stable window with sound surrounding joints
If the job goes beyond that, you're not doing basic maintenance anymore. You're rebuilding part of a structural assembly.
Resealing a minor draft or perimeter leak
This is the simpler repair, but it still needs proper prep. Smearing new sealant over dirt, loose mortar, or damp surfaces is one of the fastest ways to waste a Saturday.
Use a utility knife, scraper, stiff nylon brush, vacuum, clean rags, and a quality exterior-grade silicone caulk. Remove loose material first. Clean the joint thoroughly. Let it dry. Then apply the sealant neatly and push it into the joint rather than laying a fat bead on top.
A few practical rules matter here:
- Cut out failed sealant completely before adding new material
- Don't seal over active crumbling mortar. Remove weak material first
- Keep the bead continuous so water can't jump a skipped area
- Tool the joint cleanly to improve adhesion and runoff
If the mortar loss is deeper than a surface touch-up, stop and reassess. That may call for repointing or block replacement, not caulk alone. If you want to understand where light maintenance ends and deeper masonry restoration begins, this overview of a cheaper alternative to repointing brickwork helps frame the trade-off.
A clean joint and the right sealant beat a sloppy oversized bead every time.
Replacing one broken glass block
This is the most advanced DIY repair that still falls within reach for a steady-handed homeowner. It is not delicate because the glass is fragile. It is delicate because one bad move can crack the adjacent blocks.
To replace a single block, drill 1/8-inch holes into the surrounding mortar to weaken it, then chisel out the old block carefully. After removal, use a polymer-modified Type N mortar, which offers 20-30% higher bond strength and is necessary for Chicago's climate. This method has a 95%+ success rate compared to 70% with standard mortar mixes, according to this single-block replacement method for basement glass block windows.
Tools and materials that make the job go right
Have everything ready before you start. Stopping halfway through to buy a tool usually leads to shortcuts.
Use:
- Safety glasses, gloves, and long sleeves
- Duct tape to contain shards on the target block
- Drill with a small masonry bit
- Hammer and narrow chisel
- Vacuum and bucket
- Matching replacement block
- Polymer-modified Type N mortar
- Margin trowel or small pointing tool
- Damp cloth for cleanup
Step-by-step block replacement
Tape the damaged block
Apply duct tape across the face of the broken block. This helps keep shards contained during removal.
Drill the surrounding mortar
Drill small holes into the mortar around the target block. The goal is to weaken the bond without stressing the neighboring blocks.
Chisel inward, not outward
Lightly work the chisel toward the center of the damaged block and joint area. Don't wedge aggressively against the adjacent blocks.
Remove debris completely
Pull out broken glass and old mortar, then vacuum thoroughly. A dirty opening prevents the new mortar from seating properly.
Prepare the opening
Chip back remaining mortar so the replacement block can sit evenly. You want a clean, consistent cavity, not random high spots.
Mix mortar correctly
Mix the polymer-modified Type N mortar to a workable, stiff consistency. Too wet and it slumps. Too dry and it won't pack the joint well.
Set the new block
Center the block carefully. Pack mortar into the side gaps from both sides as access allows, then tool the joints neatly once the mortar firms up.
Clean the glass gently
Use a damp cloth. Don't scrub with anything abrasive.
Where DIY jobs fail
Most failed homeowner repairs come from one of four mistakes:
- They rush demolition and damage the next block over
- They use the wrong mortar because it was on the shelf already
- They leave dust and debris in the joint
- They judge success too early before the repair has properly cured
Chicago winters expose every one of those mistakes. A repair can look solid in mild weather and still open up once the temperature swings.
When to stop mid-project
If you uncover hidden voids, loose surrounding joints, moisture-damaged framing, or movement at the perimeter, stop. That's no longer a single-block repair. That's a sign the panel or the opening itself may be failing.
A smart DIYer knows when the repair scope has changed. That's not quitting. That's avoiding collateral damage.
Budgeting for Glass Block Repair Costs and Time
A Chicago homeowner often gets the bad news in late January. The basement window that looked fine in October now has a damp sill, a hairline crack, or a cold draft pushing through the joints. That timing matters, because freeze-thaw damage rarely stays the same for long, and cost usually depends on what winter has already done behind the surface.
What professional repair usually costs
Glass block repair pricing usually breaks into three buckets. Small joint sealing or perimeter touch-up sits at the low end. Replacing one damaged block costs more because the work has to be precise. Full panel replacement costs the most, especially if the opening needs masonry correction before a new unit goes in.
National cost guides from HomeAdvisor's glass block window cost overview show a wide range between minor repair work and full replacement. In Chicago, local conditions often push jobs toward the higher end of a general estimate because older masonry openings, rusting vents, and winter damage add labor fast.
The window size matters less than the failure itself.
Why two similar windows can price out very differently
Two basement windows can look almost identical from across the room and carry very different repair bills once the work starts. One may need a simple joint repair. The other may have loose surrounding mortar, water tracking at the sill, or an out-of-square opening that keeps stressing the panel.
Here are the cost drivers that change the number:
| Cost driver | Why it affects price |
|---|---|
| Access to the opening | Deep window wells, security bars, and finished interiors slow setup and cleanup |
| Scope of failure | One cracked block is a smaller job than widespread joint separation |
| Perimeter condition | Failed caulk, soft mortar, or a deteriorated sill adds prep and repair time |
| Panel stability | A shifting or bowing panel may require replacement instead of a local fix |
| Weather timing | Cold-weather scheduling can limit repair options or require a temporary solution first |
Chicago is where generic DIY budgeting advice often falls apart. A repair that sounds simple online can turn into masonry work once you expose freeze-thaw damage around the perimeter.
What time looks like on site
A straightforward repair is often measured in hours, not days. A single-block replacement or limited joint repair can usually be handled in one visit if the surrounding opening is sound and the weather cooperates.
Full replacement takes longer because the old panel has to come out cleanly, the opening has to be corrected, and the new unit has to be set true. Even when the hands-on work is completed in a day, curing and weather protection still affect how quickly the window is fully back in service.
Winter changes the schedule. Mortar and sealants do not forgive bad temperature decisions.
Budget for the diagnosis first. Homeowners get into trouble when they price a surface patch and the real problem is movement at the opening or water getting in around the panel.
DIY budget versus real ownership cost
DIY is cheapest when the issue is genuinely small and isolated. If you already have the right tools and the repair is limited to minor sealing, doing it yourself can make sense.
The math changes after one failed winter. If the repair traps water, cracks the next block, or lets the sill keep deteriorating, the second repair costs more than hiring a mason in the first place. I have seen plenty of basement glass block jobs where the expensive part was not the original damage. It was undoing a repair that was never suited to Chicago weather.
If you are lining this up with other exterior work, it helps to review options for financing larger home repair projects so you can plan masonry, waterproofing, and roofing work together instead of piecing them out under pressure.
When to Call a Chicago Masonry Professional
A lot of Chicago glass block failures show up after the first hard freeze. The panel looked acceptable in fall, someone ran a bead of sealant around the edge, and then January opened the joint back up. Water got into the perimeter, froze, expanded, and turned a small repair into wall work.

Chicago is hard on glass block windows because the problem usually is not the block alone. It is the opening, the sill, the surrounding mortar joints, and the way those materials move through freeze thaw cycles. Standard DIY advice often assumes a stable opening and mild weather. Older brick bungalows, two-flats, and basements here rarely give you those conditions.
Signs the job has moved past DIY
Call a professional if you see any of the following:
- More than one damaged block in the same panel
- A panel that feels loose, bowed, or out of square
- Leaks that came back after caulking or spot sealing
- Cracks running into the surrounding brick, block, or mortar
- Joint failure across large sections of the panel
- A sill, lintel, or perimeter that looks soft, spalled, or deteriorated
Those conditions point to movement or water entry around the unit, not just a bad joint.
Why these repairs fail in Chicago
Freeze thaw damage is simple and destructive. Water gets into a hairline gap, temperatures drop, the water expands, and the opening gets pushed a little farther out of shape. Repeat that enough times and a repair that looked fine in warm weather stops holding.
The National Park Service notes that masonry failure often starts with water entering small cracks and joints, then worsening through repeated freezing and thawing in cold climates. That is exactly why glass block repairs in Chicago need to be judged as masonry repairs, not just glass repairs. See the NPS guidance on water, moisture, and freeze-thaw damage in historic masonry.
A professional mason checks the whole opening before touching the panel. That includes the sill pitch, the condition of the mortar bed, the stability of the jambs, and whether the surrounding wall is already moving.
What a professional is actually correcting
On a larger repair, the work usually includes more than the glass block panel itself:
Inspecting the surrounding masonry
The sill, jambs, and nearby mortar joints get checked for cracking, voids, and moisture damage.Rebuilding or truing the opening
If the opening is out of square or the bearing surface is deteriorated, it has to be corrected before the new panel goes in.Setting the panel with proper support
A prefabricated unit still needs correct alignment and support so stress is not concentrated on one corner or edge.Using materials that fit the condition of the opening
Some repairs need mortar work. Others need sealant at specific transition points. Using one material everywhere is where a lot of homeowner repairs go wrong.Tying the repair into the wall assembly
The panel has to work with the surrounding masonry, not just sit in the hole tightly for a few months.
I have seen plenty of failed repairs where the block was fine and the opening was the core problem.
Older Chicago buildings raise the risk
Many city homes have had decades of patching, settling, tuckpointing, and water exposure. Basement openings are often the worst. A panel can be installed neatly into brick or block that is already weakened, and the new work still fails because the substrate never had a chance.
If the perimeter is deteriorated or the leak path is unclear, bring in a contractor who handles the surrounding wall as well as the window. That kind of repair overlaps directly with Chicago masonry repair services for cracked mortar, failing sills, and water intrusion.
The practical rule
Handle it yourself if the damage is isolated, the panel is solid, and the surrounding masonry is dry and intact.
Call a mason if the panel moves, the leak keeps returning, the surrounding brick or mortar is failing, or the repair has to survive another Chicago winter without guessing. That is the point where experience saves money.
Frequently Asked Questions About Glass Block Repair
Some questions come up on nearly every estimate. The answers below are the practical version, not the sales version.
Quick answers homeowners usually need
| Question | Answer |
|---|---|
| Can I patch a cracked glass block with epoxy? | Only as a temporary cosmetic measure. It doesn't replace proper block or unit replacement for a lasting repair. |
| Is a draft always coming from the glass block itself? | No. The leak may be at the perimeter joint, the sill, or the surrounding masonry. |
| Can I replace one block without replacing the whole window? | Yes, if the rest of the panel is solid and the damage is truly isolated. |
| What if the mortar looks bad in several places? | That usually points to a larger repair scope than simple sealing. A broader masonry assessment is the safer move. |
| Are basement glass block leaks always obvious? | No. Water often travels and shows up away from the true entry point. |
| Does the repair need to match the existing block exactly? | It should match in size and appearance as closely as possible so the panel stays uniform and the repair doesn't stand out. |
The question behind most of the questions
Most homeowners are really asking one thing. Will this repair last through winter? The answer depends on whether the diagnosis was right and whether the repair method fits Chicago conditions. Good prep, the correct mortar or sealant, and attention to the surrounding masonry matter more than speed.
If a repair only fixes what you can see, it usually won't be the last repair that window needs.
For homeowners, landlords, and property managers who want a repair handled by a local team that understands Chicago masonry, moisture control, and winter failure points, Expert Super Seal Roofing & Tuckpointing provides inspections, clear estimates, and repair work backed by decades of experience across the Chicagoland area.